
 English

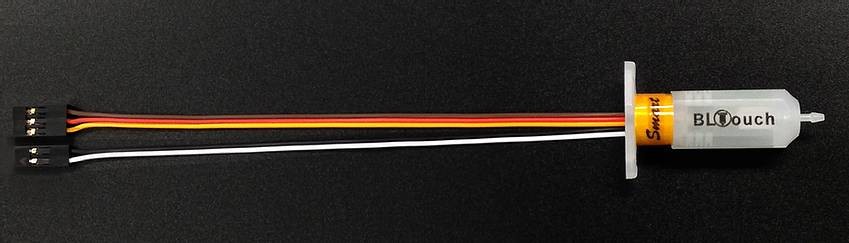
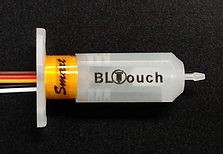
BLTouch自動調平 感應器
由 Antclas 首席執行官 Paris Kyung-yeon Lee 發明,這位非常有才華的韓國女工程師注意到打印床的水平調整一直是最令人惱火的問題,BLTouch 已成為 3D 打印機非常受歡迎和重要的模組。 它是如此受歡迎,以至於許多假冒克隆產品投放市場,但它們中沒有一個具有與它一樣的質量和性能。
“BLTouch自動調平 是一個自動調校水平的傳感器,可以精確測量打印表面的傾斜度和不平坦,使您的打印機可以補償小至 0.01mm * 的差異”


每個人都想要最好的打印成品,但首先您需要精準的水平調校。
BLTouch自動調平 是一個自動調校水平的傳感器,可以精確測量打印表面的傾斜度和不平坦,使您的打印機可以補償小至 0.01mm * 的差異
它可以與任何種類的打印床材料一起使用,例如玻璃、木材、金屬等。
許多 3D 打印機是可升級的,有些甚至預先保留了插槽,例如 Artillery Genius 和 Sidewinder X1。 請在購買前檢查您的 3D 打印機的兼容性。
* 這個量會根據不同打印機的 Z 軸步進電機運動而有所不同,有些可能最小為 0.02mm。 它是一種精確測量的工具,由 Marlin OS 計算水平的補償值並執行,必須在TFT(螢幕)固件啟用才能使用它。
已售完
由 Antclas 首席執行官 Paris Kyung-yeon Lee 發明,這位非常有才華的韓國女工程師注意到打印床的水平調整一直是最令人惱火的問題,BLTouch 已成為 3D 打印機非常受歡迎和重要的模組。 它是如此受歡迎,以至於許多假冒克隆產品投放市場,但它們中沒有一個具有與它一樣的質量和性能。
“BLTouch自動調平 是一個自動調校水平的傳感器,可以精確測量打印表面的傾斜度和不平坦,使您的打印機可以補償小至 0.01mm * 的差異”
BLTouch的主要功能和控制與通常的自動調平傳感器相同,由RC伺服和微動開關組成。 因此,BLTouch 幾乎可以應用於所有電路板。
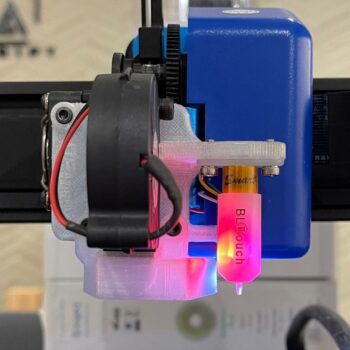
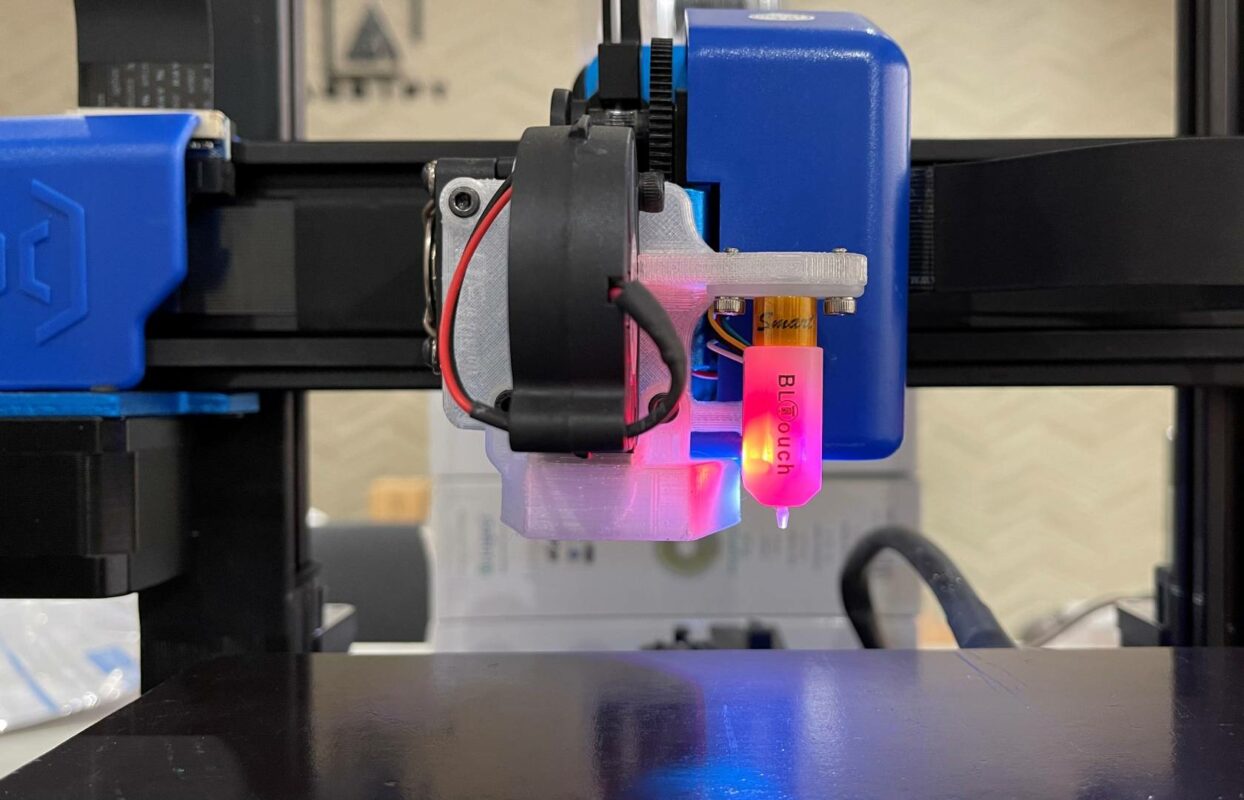
BLTouch採用漸進式設計的螺線管和霍爾效應傳感器,結構簡單,精度高。 為了用戶得到方便和愉快的打印體驗,添加了許多智能功能,如自檢、警報、警報釋放和觸控開關模式、藍色 LED 用於伺服信號指示和 Z 探針(Zmin)測試。
簡單
BLTouch 易於應用,因為它具有小而簡單的結構。 由於 BLTouch 像平常的自動床調平傳感器操作,因此收集信息和設置固件將是一項簡單的任務。
聰明
自身檢測:在電源開啟後,一次測試中推針會操作兩次。
警報:如果在自檢或操作過程中檢測到問題,AI 將閃爍 LED 指示燈。
線路缺陷指示燈: 藍色和紅色的LED用以顯示接線是否正常。
高精度
BLTouch 的重複性標準偏差約為 0.005 毫米,就那麼精確。
Logic Voltage Free (Open Drain Output)
3.3V / 5V logic voltage free(預設值).
長行程 : ≒ 6.5mm
行程比V2.0最多長1.6mm
BLTouch和其他感應器比較

※ 以上數據會因組裝形狀及其他環境而異。
但是用低質量的3D打印機組裝,我們能得到0.001~0.05mm的值。 (使用同一個BLTouch) 實際上,0.05左右在FDM型3D打印機上也不是什麼大問題。
■ BLTouch
BLTouch必須垂直於地面安裝
如果BLTouch圖釘不能垂直於地面,BLTouch就會發出錯誤的信號。

■ 微動開關
BLTouch 具備微動開關、伺服電機、伺服臂三種功能。 如果用床調平的微動開關傳感器不包括收回和展開方法,則比較將毫無意義。
■ 電感式接近傳感器
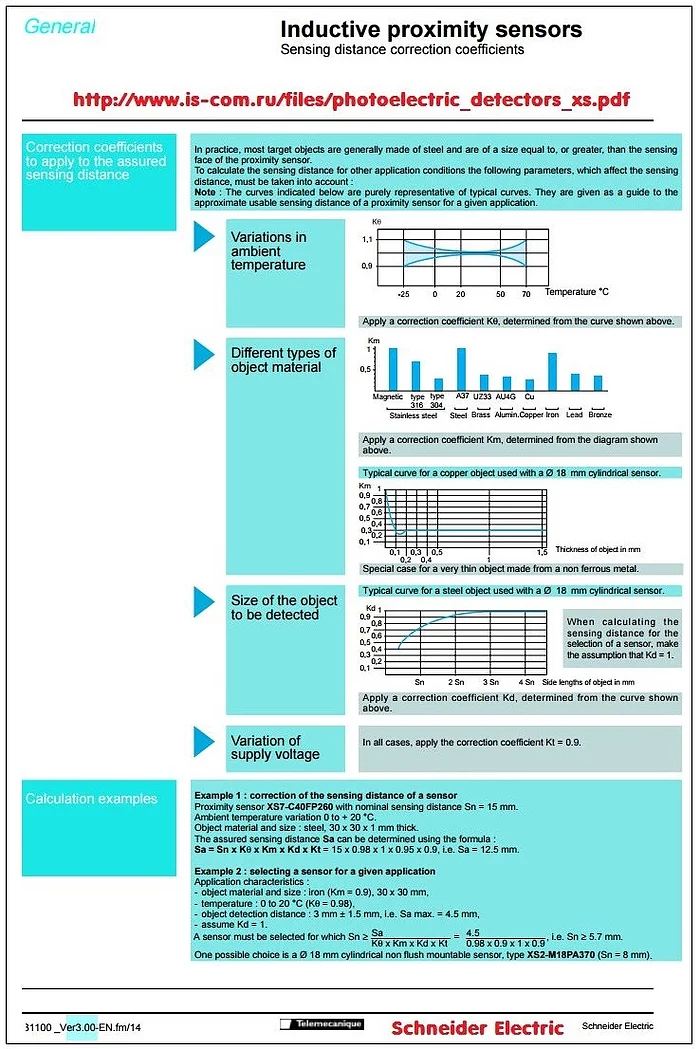
對於電感式接近傳感器,要計算其他應用條件下的感應距離,必須考慮以下影響感應距離的參數。 (例如:環境溫度的變化(Kθ)、不同類型的物體材料(Km)、待檢測物體的尺寸(Kd)、電源電壓的變化(Kt))
Sa(保證感應距離) = Sn x Kθ x Km x Kd x Kt Sn : 標稱感應距離如果非接觸式電感式接近傳感器可以在整個工作區域提供相同的參數,它必須是3D打印機最好的自動調平傳感器.
但是誰能提供它?
大多數金屬床在一個床中具有不同的溫度(Kθ)區域,其厚度(Kd)和物體材料(Km)也因螺栓,螺母或支撐物等而異。
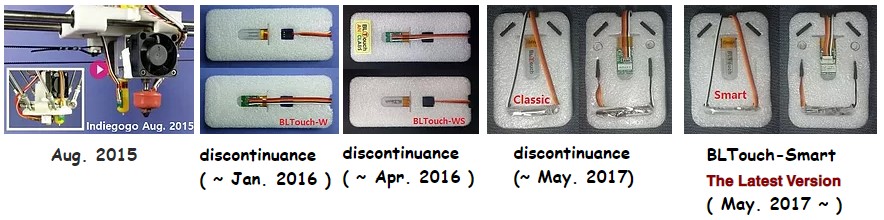
正版 BLTouch 在 PCB 上有一個二維碼。
如果PCB上沒有二維碼,請懷疑或許購入盜版(2017年5月以後生產的所有BLTouch都包含二維碼)
中國不道德廠商(如3D Touch和TL Touch等)生產的假冒BLTouch正在傷害許多消費者。
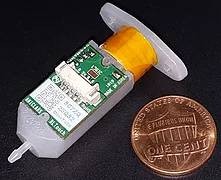
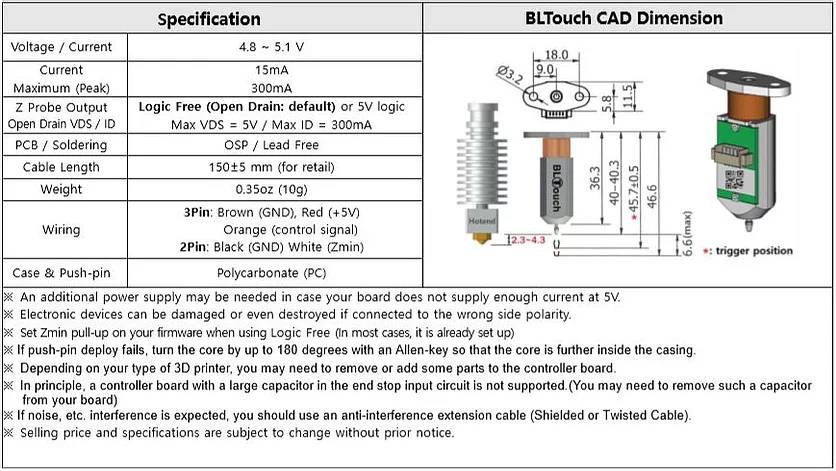
BLTouch 由 Atmel ATtiny2313A、螺線管和推針組成。
創新電磁閥:超省電
在空閒狀態,當推針被拉出或縮回時,螺線管上沒有任何電流流動。 整個器件的待機電流在工作狀態下平均低於15mA,但在引腳移動時,突然約100ms,器件中流過低於300mA的電流。 低功耗甚至降低焦耳熱,防止發熱問題。
霍爾傳感器:自由床身材料選擇
BLTouch 既不使用光學傳感器,也不使用接近(電感/電容)傳感器。
BLTouch 由霍爾效應控制,提供高精度。 因此床層材料可以自由選擇。
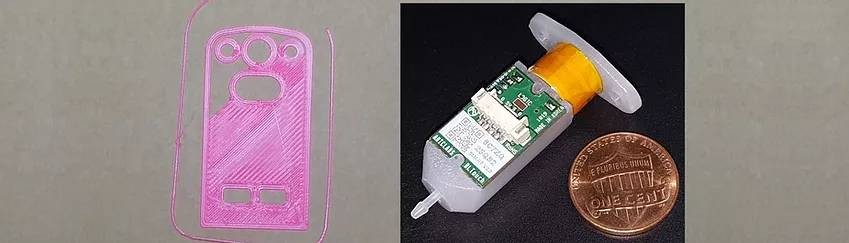
優化結構:更大的構建尺寸
BLTouch 是一種小型且技術密集型的設備。 打印尺寸可以設置為比其他現有的自動調平傳感器更大。
易於使用
BLTouch 使用現有的 RC 伺服電機信號,因此只需在移除伺服電機後將 BLTouch 插在相同的引腳上即可。
通過 G-Code控制
Open Drain for Logic Voltage Free
在 BLTouch 中,額外的 MOSFET 用於實現 Logic Free 3.3V / 5V(Open Drain)輸出模式。
Open Drain(默認)模式取決於您的控制板的邏輯電平,因此如果您的電路板是 5V 邏輯系統,BLTouch 在5V 邏輯模式上運作。如果您的電路板是 3.3V 邏輯系統。,則會在3.3V上運作。
除了一些特殊情況(例如,具有大電容的 Zmin 輸入的控制器板)之外,Smart V3 是 V2 的直接替代品(無需修改固件)。

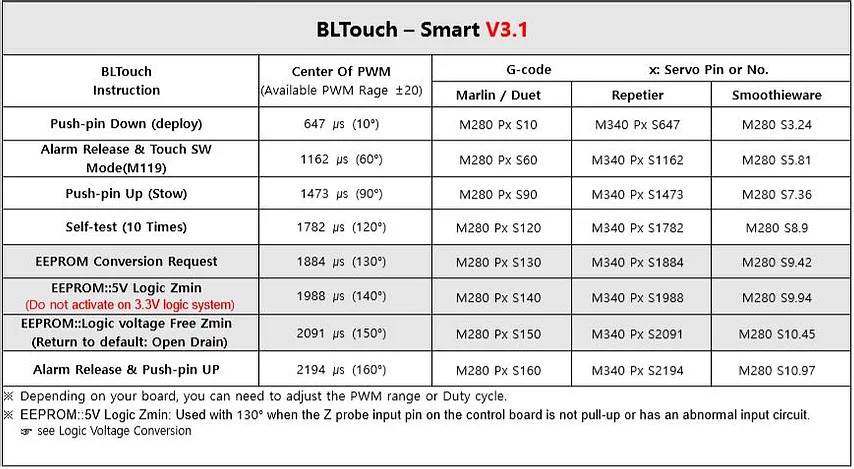
Signal Timing Diagram

1) If the red LED flashes to 80% duty during 3D printing, check the wiring of the red cable (poor wiring).
It may be necessary to repair or reinstall the cable.
2) if the red LED in BLTOUCH flashes at 80% duty right after the 3D printer is switched on, please release it with S60 or S160.
It’s a message to check Wiring because your 3D printer board is already sending a control signal to BLTouch before BLTouch power is turned on. Don’t worry, your 3D printer and BLTouch work perfectly even if the Red LED flashes at 80% duty.
It is common for BLTouch control signals to occur at machine startup or a little later.
Z Probing
Probing with Push-pin Down(M280 P0 S10) : tS1090 / tS1090*:
Step 1 : Push-pin Down(M280 P0 S10)
Step 2 : Probing(keep M280 P0 S10)
Step 3 : Push-pin Up(M280 P0 S90) after triggered
Caution: An alarm may occur.
Probing with Push-pin Down(M280 P0 S10) : tS10 ← Recommended
Step 1 : Push-pin Down(M280 P0 S10)
Step 2 : Probing(keep M280 P0 S10)
Step 3 : After triggered, if probing is not finished yet, go Step 2.
Step 4 : Push-pin Up(M280 P0 S90)
Caution: An alarm may occur.
Probing with Touch Switch Mode(M280 P0 S60) : tS60
Step 1 : Push-pin Down(M280 P0 S10)
Step 2 : Touch Switch Mode(M280 P0 S60)
Step 3 : Probing(keep M280 P0 S60)
Step 4 : After triggered, if probing is not finished yet, go Step 3.
Step 5 : Push-pin Up(M280 P0 S90)
Caution: The push pin may not be completely down.
Probing with Touch Switch Mode(M280 P0 S60) : tS60 ← Recommended
Step 1 : Push-pin Down(M280 P0 S10)
Step 2 : Touch Switch Mode(M280 P0 S60)
Step 3 : Probing(keep M280 P0 S60)
Step 4 : After triggered, if probing is not finished yet, go Step 1.
Step 5 : Push-pin Up(M280 P0 S90)
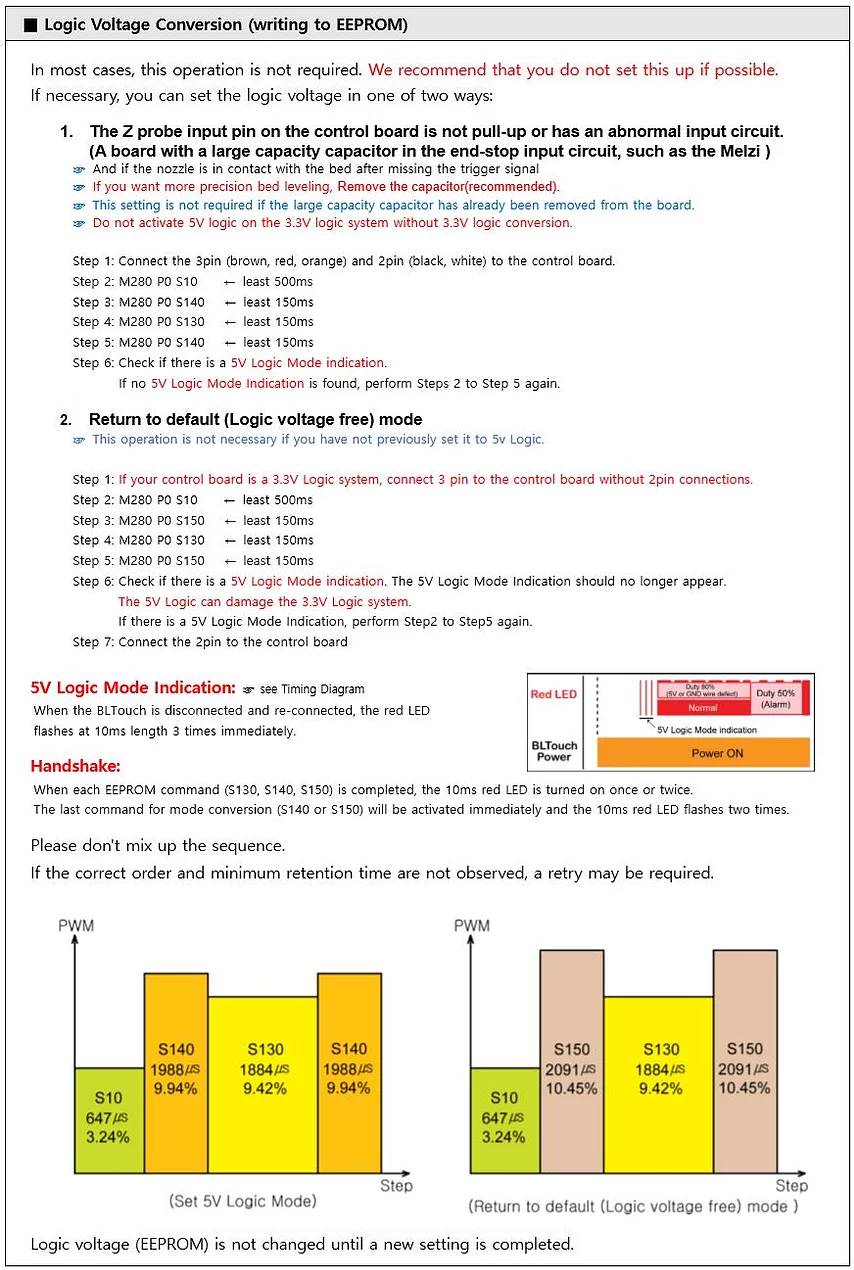
Logic Voltage Conversion (writing to EEPROM)
Push-pin
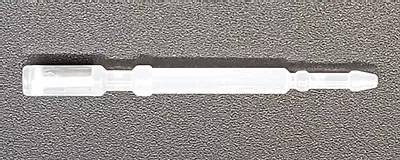
BLTouch-Smart V2.0 and later(Engineering plastic) To protect the device, it can bend more easily than aluminum pins.
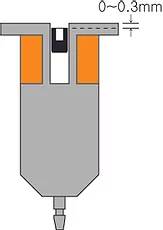
Correct position of Core (V3.x)
Except some boards(For example, a board consisting of a Zmin Pin with built-in large capacity Capacitor), Smart V2.x can be replaced by Smart V3 without firmware modification.
My board has a large capacitor in the end stop input circuit.
Creality3D CR-10S Pro Wiring or my 3D Printer has an inductive sensor
1 X BLTouch(Smart V3.1)
Spare parts – for just in case something happens
(We do not provide spare parts and cable to 3D printer makers)
2 X Screw & Nut & Washer
2 X Spring for BLTouch Mounting
2 X Dupont Housing Shell 3Pin
2 X Dupont Housing Shell 2Pin
2 X Dupont Housing Shell 1Pin
10 X Dupont Terminal (Male & Female)
1 X Jumper Cap
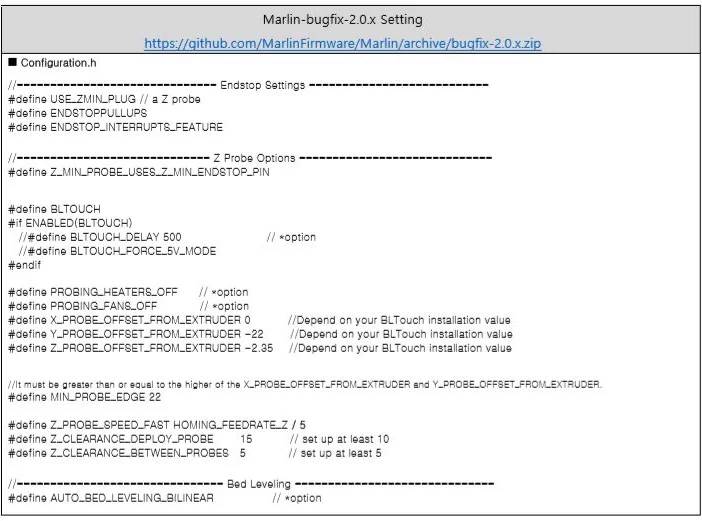
Please update the firmware in the following order:
Step 1: Copy the file below and overwrite at the Marlin folder. <== e.g. default
Marlin-bugfix-2.0.xconfigdefaultConfiguration.h
Marlin-bugfix-2.0.xconfigdefaultConfiguration_adv.h
Step 2: Look at the Configuration.h at your previous firmware and edit Configuration.h at Marlin.
Step 3: Check your 3D printer works well.
Step 4: Please install your BLTouch.
Step 5: Edit Configuration.h and Configuration_adv.h like below.
Please refer to other auto bed leveling setting documents ( Youtube etc. ).
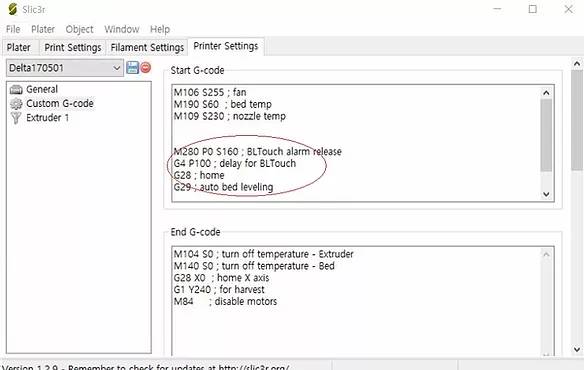
Insert the following G-code into Slic3r or Cura
Logic voltage Free mode(Recommended) ← Both 3.3V /5V Logic are available、
;When using Default mode, you do not need to declare logic mode.
M280 P0 S160 ; BLTouch alarm release
G4 P100 ; delay for BLTouch
G28 ; home
G29 ; auto bed leveling
If the nozzle is in contact with the bed after missing the trigger signal(A board with large capacity capacitor in end-stop input circuit, such as the Melzi).
;The first one mode declaration will last until power OFF or a new mode transition. ← (Only if the
;firmware does not support it yet)
M280 P0 S140 ← Only 5V Logic mode(Do not activate 5V logic on 3.3V logic system without 3.3V logic conversion)
G4 P2000 ; delay for BLTouch
M280 P0 S160 ; BLTouch alarm release
G4 P100 ; delay for BLTouch
G28 ; home
G29 ; auto bed leveling
Boards with large capacity capacitor in end-stop input circuit :
Melzi and some of the Creality3D, ANET board, etc.
(Select 1 if you have already removed the capacitor from your board)
e.g. Slic3r
One I/O for control (Orange wire : PWM or Software PWM)
One I/O for Zmin(White wire : endstop / Z-probe)
GND and +5V power
Most Board provides its own servo pin, so BLTouch can be used connected to one of those servo pins.
As each servo pin has its own number, BLTouch will be controled with the servo pin number as following.
(Soldering and firmware update might be needed in rare case)
M280 P0 S90 ← SERVO0_PIN
M280 P1 S90 ← SERVO1_PIN
M280 P2 S90 ← SERVO2_PIN
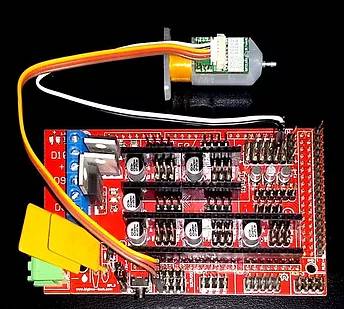
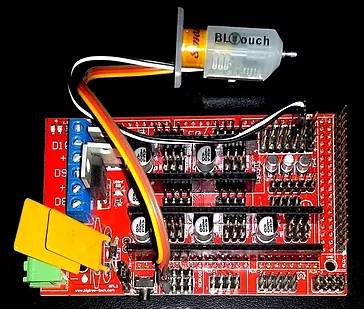
e.g. RAMPS1.4 Wiring
Servo signal(orange wire) : D11 (SERVO0), Zmin (white wire) : D18 (Zmin endstop)
I can find a servo pin on my board. ☜ click here
RAMPS1.3/1.4, MKS-Gen V1.3, MKS-Base V1.4, etc.
I can not find any Servo pin on my board. ☜ click here
If your control board does not provide Servo Pin please change your code as below.
Please connect orange wire to the spare pin such as Endstops or Extensions pin (e. g: Xmax, Ymax, Zmax, etc.) and modify as following refer to pins_YourMotherboard.h.
MKS-Base V1.2, mini-Rambo, etc.
I can not find Servo Pin on my board and ☜ click here
#define SERVO0_PIN is not included in pins_YourMotherboard.h.
If your control board does not provide Servo pin, please modify as following. Connect orange wire to the spare I/O pin such as Endstops or Extensions pin (e. g : Xmax, Ymax, Zmax, etc.) and add following code to pins_YourMotherboard.h.
Sanguinololu1.3a, Melzi , Ender-3, CR-10, CR-10S(V1.1.3 / V1.1.4), Anet, FlashForge, Azteeg X3, etc.
32bit board
Smoothieboard, MKS-Sbase, BBP1S, Alligator, AZSMZ, STEVAL-3DP001V1, Duet, etc.
My board has a large capacity capacitor in the end stop input circuit.
Creality3D CR-10S Pro Wiring or my 3D Printer has an inductive sensor
※ When replacing a conventional proximity sensor with a BLTouch, install a jumper cap between the signal and GND if necessary.
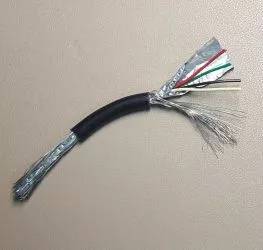
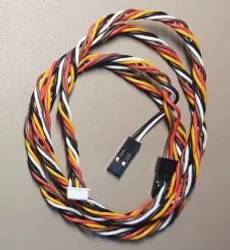
If noise, etc. interference is expected, you should use an anti-interference extension cable(Shielded or Twisted Cable or Copper Shield Network etc.).
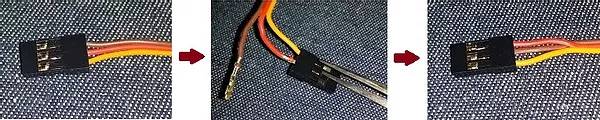
If you need, you can rearrange the position of cables by tweezers or cutter like in the picture..
| 平台校正 | |
|---|---|
| 品牌發源地 |

已售完


商品評價
目前沒有評價。