BLTouch Auto Bed Leveling Sensor – The Perfect Helper for Effortless Leveling

HK$ 368.00

Every one wants a fabulous print, but first thing first you need a precise bed leveling

BLTouch is an auto leveling sensor that can precisely measure the tilt of the print surface so that your printer can compensate as small as 0.01mm* difference.

It could work with any kind of bed materials, such as glasses, woods, metals, and so on.

A lot of 3D printers are upgradable and some even reserved slots such as Artillery Genius and Sidewinder X1. Please check the compatibility of your 3D printer before purchase.

*This amount can be vary based on the Z axis stepper motor movements of different printers, some might be 0.02mm as minimum. It is a tool for precise measurement, the compensation is controlled and performed by the Marlin OS, the TFT(screen) firmware has to enable to use it.

Out of stock

SKU: P-ANTCLABS-BLTOUCH Category: Tags: , ,

BLTouch Auto Bed Leveling Sensor

Invented by Antclabs CEO Paris Kyung-yeon Lee, a very talented Korean female engineer who noticed bed leveling has been the most irritating problem, BLTouch has become a very popular and important mods for 3D printers. It is so popular that a lot of fake clones released to the market, however none of them has the quality and ability to perform just as it does.

“BLTouch is an auto leveling sensor that can precisely measure the tilt of the print surface so that your printer can compensate the 0.01mm* difference.”

Antclabs BLTouch CEO Paris Kyung-yeon Lee, a very talented Korean female engineer who noticed bed leveling has been the most irritating problem and invented BLTouch

Read more about Paris Kyung-yeon Lee and Antclabs

Features

Main functions and controls of BLTouch are the same as usual auto bed leveling sensor, consists of RC servo and micro switch. Thus, BLTouch can be applied on almost every board.

BLTouch is fulfilled with simple structure and high precision by using progressively designed solenoid and hall sensor. It aims for user convenience and enjoyable printing by adding many smart functions, such as self-test, alarm, alarm release & Touch Switch mode, Blue LED for servo signal indicating and Z-probe(Zmin) Testing.

Simple

BLTouch can be easily applied, since it has a small and simple structure. As BLTouch works as usual auto bed leveling sensor, Gathering information & setting up your firmware will be an easy task.

Smart

Self-test : The push pin operate two times in a test when the power is on.
Alarm : The AI will flash the LED indicator if a problem is detected during a self-test or operation.
Wiring defect indicator : Blue and Red LED for indicating wiring defects.

High-precision

BLTouch’s Standard Deviation in repeatability is around 0.005mm, at that precise.

Logic Voltage Free(Open Drain Output)

3.3V / 5V logic voltage free(default).

Long stroke : ≒ 6.5mm

The stroke is up to 1.6mm longer than V2.0

BLTouch vs. other sensor

BLTouch vs. other sensor

※ The data above can be varied by assembling shape and other environments.
But assembled with the low quality 3D printer, we just get the value as 0.001~0.05mm. (It was the same BLTouch) Actually, around 0.05 is also not much problem on FDM type 3D printers.

BLTouch Auto Bed Leveling Sensor - Print sample after doing the auto leveling calibration, it shows that the first layer is so consistent and beautiful.
BLTouch Auto Bed Leveling Sensor - The Perfect Helper for Effortless Leveling

■ BLTouch

BLTouch must be installed perpendicular to the ground.
If BLTouch push-pin can’t be perpendicular to the ground, BLTouch will put wrong signal out.

Micro Switch vs BL Touch

■ Micro switch

BLTouch is equipped with all three function as micro-switch, servo motor and also servo arm. Comparison would be pointless if micro switch sensor for bed leveling does not include the retraction and deployment method.

■ Inductive Proximity Sensor

At Inductive Proximity Sensors, to calculate the sensing distance for other application conditions the following parameters, which affect the sensing distance, must be taken into account. (For example : Variations in ambient temperature(Kθ), Different types of object material(Km), Size of the object to be detected(Kd), Variation of supply voltage(Kt))

Sa(assured sensing distance) = Sn x Kθ x Km x Kd x Kt Sn : nominal sensing distanceIf non-contacting Inductive Proximity sensor can be provided the same Parameter at whole working area, it must be the best auto bed leveling sensor for 3D printers.

But who can provide this?

Most of metal beds have various temperature(Kθ) areas at one bed, and its thickness(Kd) and object material(Km) are also various because of bolts, nuts, or supporters etc.

BL Touch History

Genuine BLTouch has a QR code on PCB.

If there is no QR code on PCB, suspect it (All BLTouch produced after May 2017 includes QR code)

The fake BLTouch produced by Chinese immoral manufacturers (such as 3D Touch and TL Touch etc.) is hurting many consumers.

Technology

BLTouch consists of Atmel ATtiny2313A, solenoid, and a push pin.

Innovative Solenoid : Ultra Power Saving

On idle state, while the push-pin is whether pulled out or retracted, there are no any electric current flowing on solenoid. Standby electric current in the whole device is below average of 15mA on working state, but while the pin is moving, in a sudden about 100ms, under 300mA flows in the device. Low power consumption even drops joule heating, and it prevents heat problem.

Hall Sensor : Free Bed material Selection

BLTouch does not uses either optical, nor proximity(inductive/capacitive) sensor.
BLTouch is controlled by hall effect, providing high precision. Thus the bed material can be freely selected.

Optimized structure : Larger Build Size

BLTouch is a small, and technology-intensive device. Build size can be set larger than other existing auto bed leveling sensor.

Easy to Use

BLTouch uses existing RC Servo motor signal intactly, so just plug BLTouch on the same pins after removing servo motor.

Control by G-code 

Open Drain for Logic Voltage Free

In the BLTouch, an additional MOSFET is used to implement the Logic Free 3.3V / 5V (Open Drain) output mode.

Open Drain(Default) mode depends on the logic level of your control board, so if your board is a 5V logic system, BLTouch operates in 5V logic mode and 3.3V logic mode if your board is a 3.3V logic system.

Other than some special cases  (for example, a controller board that has a Zmin input with a large capacitance), the Smart V3 is a drop-in replacement for a V2 (no firmware modification needed).

Signal Timing Diagram

1) If the red LED flashes to 80% duty during 3D printing, check the wiring of the red cable (poor wiring).

It may be necessary to repair or reinstall the cable.

2) if the red LED in BLTOUCH flashes at 80% duty right after the 3D printer is switched on, please  release it with S60 or S160. 

It’s a message to check Wiring because your 3D printer board is already sending a control signal to BLTouch before BLTouch  power is turned on. Don’t worry, your 3D printer and BLTouch work perfectly even if the Red LED flashes at 80% duty.

It is common for BLTouch control signals to occur at machine startup or a little later.

Z Probing

Probing with Push-pin Down(M280 P0 S10) : tS1090 / tS1090*:
Step 1 : Push-pin Down(M280 P0 S10)
Step 2 : Probing(keep M280 P0 S10)
Step 3 : Push-pin Up(M280 P0 S90) after triggered
Caution: An alarm may occur.

Probing with Push-pin Down(M280 P0 S10) : tS10  ← Recommended
Step 1 : Push-pin Down(M280 P0 S10)
Step 2 : Probing(keep M280 P0 S10)
Step 3 : After triggered, if probing is not finished yet, go Step 2.
Step 4 : Push-pin Up(M280 P0 S90)
Caution: An alarm may occur.

Probing with Touch Switch Mode(M280 P0 S60) : tS60
Step 1 : Push-pin Down(M280 P0 S10)
Step 2 : Touch Switch Mode(M280 P0 S60)
Step 3 : Probing(keep M280 P0 S60)
Step 4 : After triggered, if probing is not finished yet, go Step 3.
Step 5 : Push-pin Up(M280 P0 S90)
Caution: The push pin may not be completely down.

Probing with Touch Switch Mode(M280 P0 S60) : tS60  ← Recommended
Step 1 : Push-pin Down(M280 P0 S10)
Step 2 : Touch Switch Mode(M280 P0 S60)
Step 3 : Probing(keep M280 P0 S60)
Step 4 : After triggered, if probing is not finished yet, go Step 1.
Step 5 : Push-pin Up(M280 P0 S90)

Logic Voltage Conversion (writing to EEPROM)

Push-pin

BLTouch-Smart V2.0 and later(Engineering plastic) To protect the device, it can bend more easily than aluminum pins.

Correct position of Core (V3.x)

Specifications (Smart V3)

Except some boards(For example, a board consisting of a Zmin Pin with built-in large capacity Capacitor), Smart V2.x can be replaced by Smart V3 without firmware modification.

My board has a large capacitor in the end stop input circuit. ​

Creality3D CR-10S Pro Wiring or my 3D Printer has an inductive sensor

Package List

1 X BLTouch(Smart V3.1)

Spare parts – for just in case something happens
(We do not provide spare parts and cable to 3D printer makers)
2 X Screw & Nut & Washer
2 X Spring for BLTouch Mounting
2 X Dupont Housing Shell 3Pin
2 X Dupont Housing Shell 2Pin
2 X Dupont Housing Shell 1Pin
10 X Dupont Terminal (Male & Female)
1 X Jumper Cap

Firmware Setting

Please update the firmware in the following order:

Step 1: Copy the file below and overwrite at the Marlin folder. <== e.g. default
Marlin-bugfix-2.0.xconfigdefaultConfiguration.h
Marlin-bugfix-2.0.xconfigdefaultConfiguration_adv.h

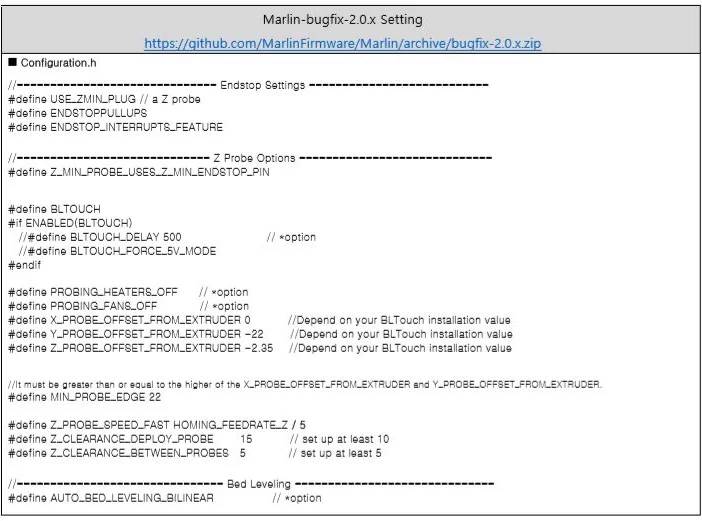
Step 2: Look at the Configuration.h at your previous firmware and edit Configuration.h at Marlin.
Step 3: Check your 3D printer works well.
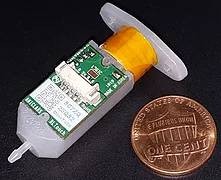
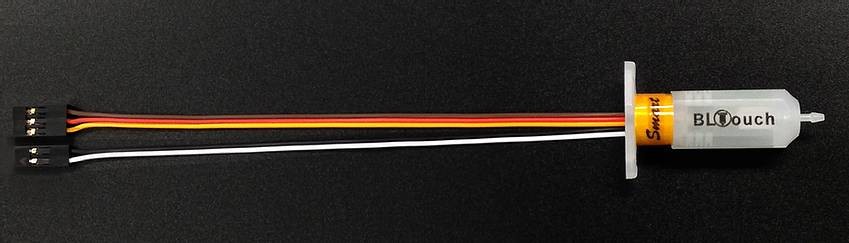
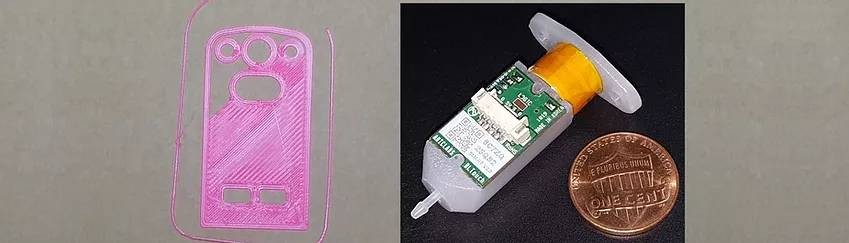
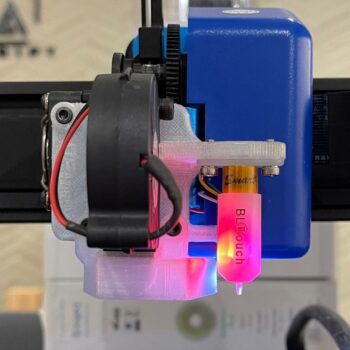
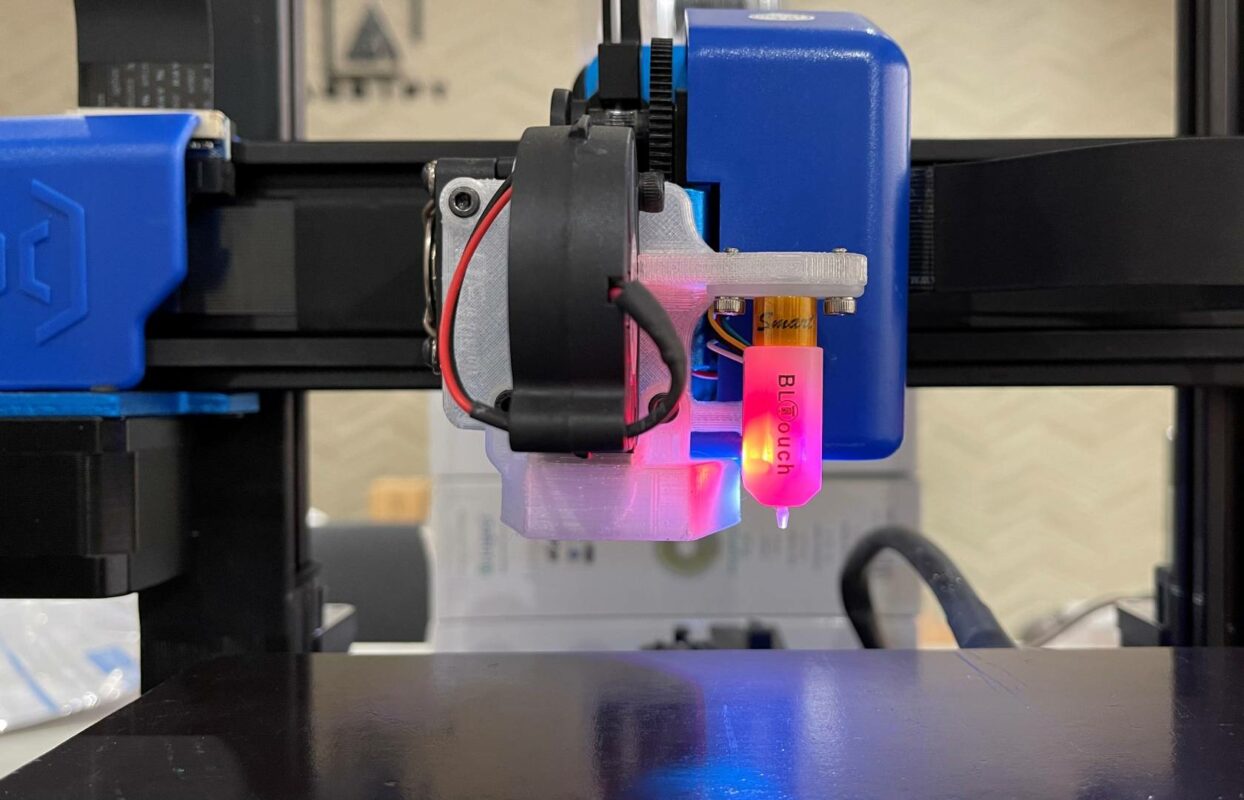
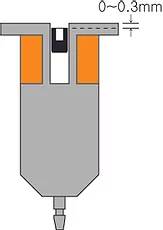
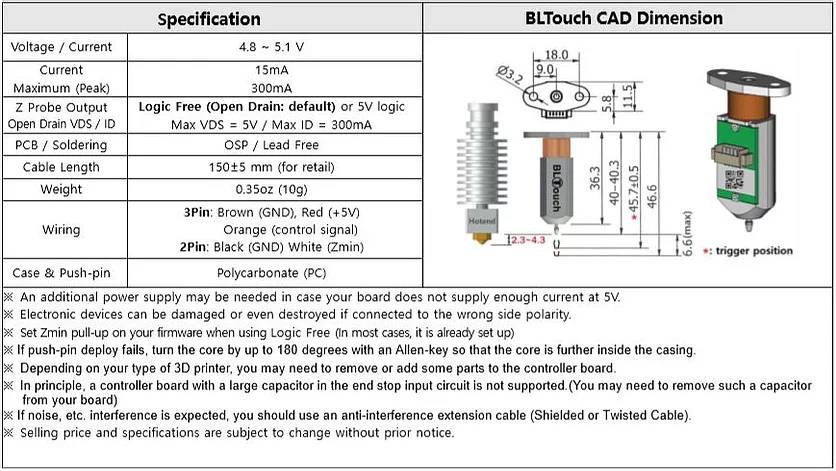
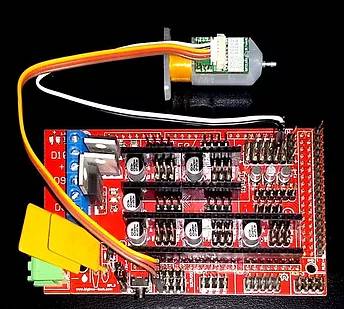
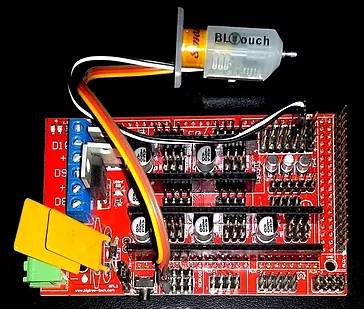
Step 4: Please install your BLTouch.
Step 5: Edit Configuration.h and Configuration_adv.h like below.

Please refer to other auto bed leveling setting documents ( Youtube etc. ).

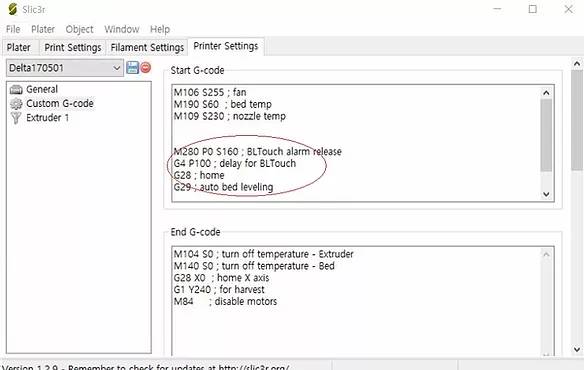
Insert the following G-code into Slic3r or Cura

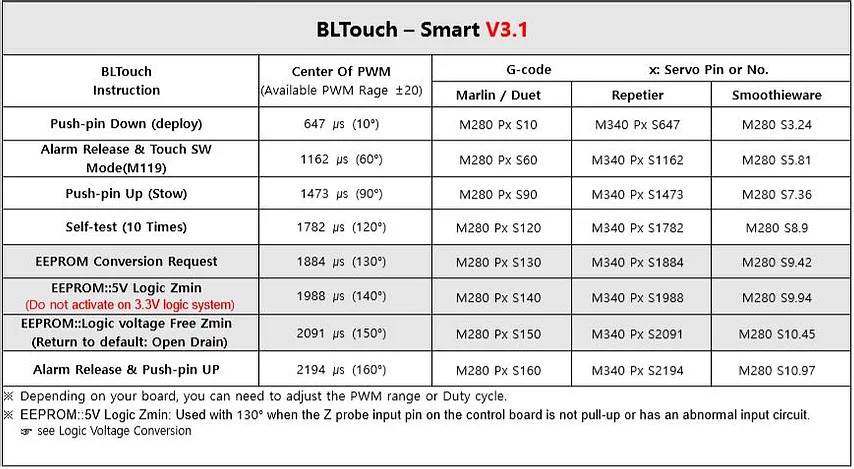
Logic voltage Free mode(Recommended) ← Both 3.3V /5V Logic are available

;When using Default mode, you do not need to declare logic mode.
M280 P0 S160 ; BLTouch alarm release
G4 P100 ; delay for BLTouch
G28 ; home
G29 ; auto bed leveling

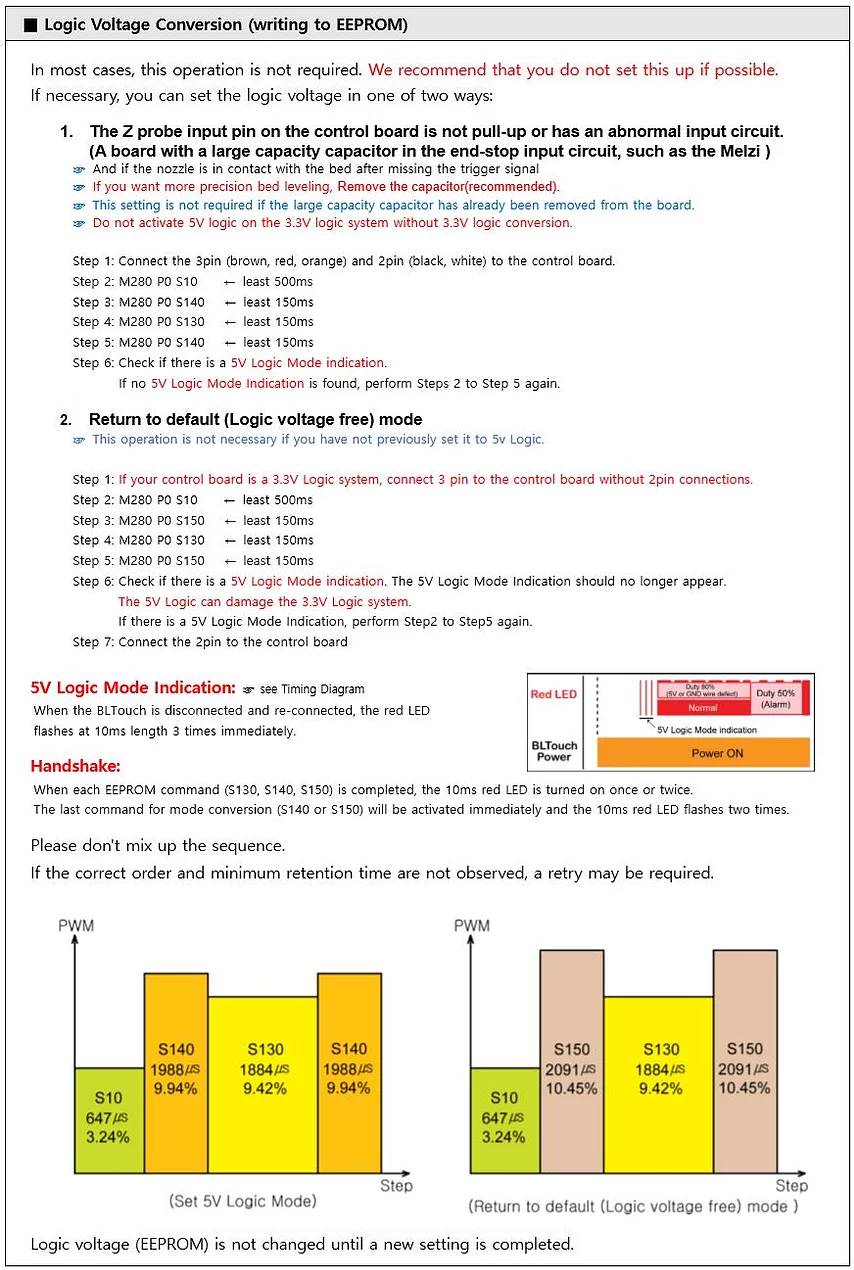
If the nozzle is in contact with the bed after missing the trigger signal(A board with large capacity capacitor in end-stop input circuit, such as the Melzi).

;The first one mode declaration will last until power OFF or a new mode transition. ← (Only if the
;firmware does not support it yet)
M280 P0 S140   ← Only 5V Logic mode(Do not activate 5V logic on 3.3V logic system without 3.3V logic conversion)
G4 P2000 ; delay for BLTouch
M280 P0 S160 ; BLTouch alarm release
G4 P100 ; delay for BLTouch
G28 ; home
G29 ; auto bed leveling

Boards with large capacity capacitor in end-stop input circuit :
Melzi and  some of the Creality3D, ANET board, etc.
(Select 1 if you have already removed the capacitor from your board)

e.g. Slic3r

Wiring

One I/O for control (Orange wire : PWM or Software PWM)
One I/O for Zmin(White wire : endstop / Z-probe)
GND and +5V power

Most Board provides its own servo pin, so BLTouch can be used connected to one of those servo pins.
As each servo pin has its own number, BLTouch will be controled with the servo pin number as following.
(Soldering and firmware update might be needed in rare case)

M280 P0 S90 ← SERVO0_PIN
M280 P1 S90 ← SERVO1_PIN
M280 P2 S90 ← SERVO2_PIN

e.g. RAMPS1.4 Wiring

Servo signal(orange wire) : D11 (SERVO0),     Zmin (white wire) : D18 (Zmin endstop)

More Wiring

I can find a servo pin on my board.  ☜  click here
RAMPS1.3/1.4, MKS-Gen V1.3, MKS-Base V1.4, etc.

I can not find any Servo pin on my board.  ☜  click here
If your control board does not provide Servo Pin please change your code as below.
Please connect orange wire to the spare pin such as Endstops or Extensions pin (e. g: Xmax, Ymax, Zmax, etc.) and modify as following refer to pins_YourMotherboard.h.
MKS-Base V1.2, mini-Rambo, etc.

I can not find Servo Pin on my board and   ☜  click here
#define SERVO0_PIN is not included in pins_YourMotherboard.h.
If your control board does not provide Servo pin, please modify as following. Connect orange wire to the spare I/O pin such as Endstops or Extensions pin (e. g : Xmax, Ymax, Zmax, etc.) and add following code to pins_YourMotherboard.h.
Sanguinololu1.3a, Melzi , Ender-3, CR-10, CR-10S(V1.1.3 / V1.1.4),  Anet, FlashForge, Azteeg X3, etc.

32bit board
Smoothieboard, MKS-Sbase, BBP1S, Alligator, AZSMZ, STEVAL-3DP001V1, Duet, etc.

My board has a large capacity capacitor in the end stop input circuit.

Creality3D CR-10S Pro Wiring or my 3D Printer has an inductive sensor

※ When replacing a conventional proximity sensor with a BLTouch, install a jumper cap between the signal and GND if necessary.

BLTouch Extension Cable

If noise, etc. interference is expected, you should use an anti-interference extension cable(Shielded or Twisted Cable or Copper Shield Network etc.).

Rearrange the position of cables

If you need, you can rearrange the position of cables by tweezers or cutter like in the picture..

Bed Leveling

Brand Origin

Brand

BLTouch

BLTouch is a renowned auto bed leveling module for 3D Printers invented by Paris Kyung-yeon Lee, from Antclabs, South Korean.
BLTouch Logo

Reviews

There are no reviews yet.

Be the first to review “BLTouch Auto Bed Leveling Sensor – The Perfect Helper for Effortless Leveling”

This site uses User Verification plugin to reduce spam. See how your comment data is processed.
BLTouch Auto Bed Leveling Sensor - The Perfect Helper for Effortless Leveling
BLTouch Auto Bed Leveling Sensor – The Perfect Helper for Effortless Leveling

Out of stock